Add a Rubric to a Moodle Assignment
Creating Rubrics for Moodle Assignments
Overview:
This article provides the steps for creating rubrics for Moodle assignments.
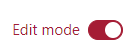
1. Navigate to your Moodle course page and click Editing mode button on.
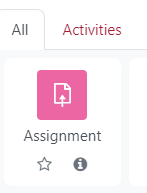
2. Create an Assignment activity in Moodle by clicking the Add an activity or resource link and selecting Assignment.
![]()
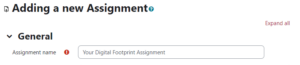
3. Give the Assignment activity a title.
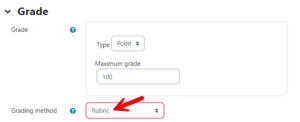
4. Scroll down to the “Grade” section and click to open the options. Under grade settings change the “Grade method” option from Simple direct grading to Rubric.
5. Once you have completed your assignment settings, click the Save and display button at the bottom of the page.

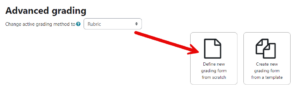
6. On the “Advanced grading” screen, select the option to Define a new grading form from scratch.
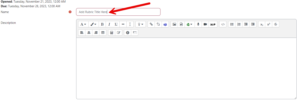
7. Begin by naming your rubric. This will help you identify the rubric on the list of available templates later. You may also add a description to help identify your form.
8. Use the Rubric table to add your criterion and levels.

- Click the Add criterion are often referred to as Learning Outcomes. This is where you define the ideal outcome of the assignment.
Type or paste your criterion into the cell by clicking on the applicable text. Use one outcome per criterion unless you are assessing multiple items together or it will be hard to grade. - Click Add levels to add the descriptions for each point value within the rubric.
Levels and points can be edited by clicking on the applicable text within the cell.
Moodle Rubrics operate best with a level 0 (no points) as the lowest value. - Add additional levels by clicking the button at the end of each row. Each click will provide a new column.
- Add more criterion to your rubric by clicking the Add criterion button. Each click will create one new row.
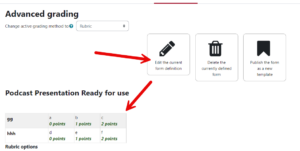
Sample Completed Criterion

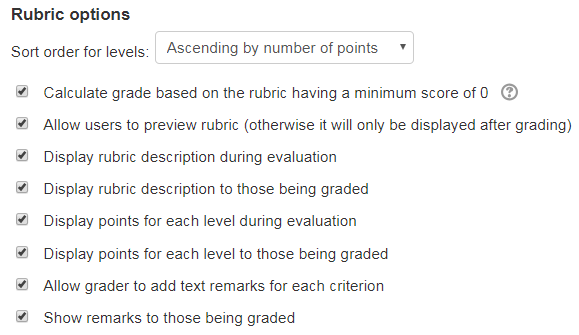
9. Select the appropriate settings below your rubric to control the behavior and display options.
10. Click the appropriate option at the bottom of the page to save your changes to the grading form.

You must make the rubric ready before you will be able to grade the assignment.
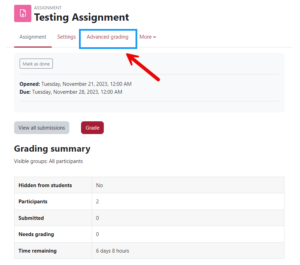
11. The following screen will display when your rubric is ready to use.
12. And you’re done! Click on the first icon, Edit the current form to make changes to the rubric.
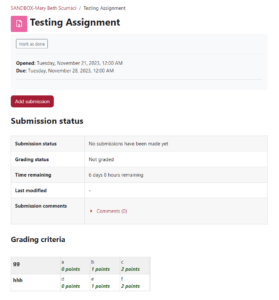
13. When students see the assignment, the Rubric will show under Grading criteria.
Video
Video: Add Rubrics to a Moodle Assignment (4:05)
Select the play button to watch the video. Select the CC for the Closed Captioning and the diagonal arrow to maximize the video and access the video transcript by clicking on the Captions link on the left menu.