Help Desk Ticket Submission and Customer Interface
Help Desk Ticket Submission and Customer Interface
If you are having a technical issue and need help from Trocaire’s Information Technology or Education Technology Help Desk we have implemented an easy to follow process to submit, monitor, and give feedback on your Help Desk tickets submitted. Trocaire College’s Information Technology and Education Technology departments strive for providing our end user population a positive experience in all technical support needs.
If you have any questions or concerns about your experience, please email Kamu Pindiprolu, Chief Information Officer, at [email protected]
How Can I Submit a Ticket?
There are multiple ways you can contact our Help Desk and get the help you need:
-
- Email [email protected]
- Call the Help Desk at extension 4330 (general IT help) or Education Technology at extension 2552
- Pay us a visit in person on the third floor of the main campus – room 360 for IT and 325 for Ed Tech
- ***NEW*** Create and submit a ticket online using the new Help Desk ticketing system!
Please NOTE: Option 4 is currently for Staff use only. Announcements will be sent out when the system is rolled out to additional users. For now, Faculty & Students can continue using Options 1 – 3 for Help Desk support.
- Go to the following link: https://myportal.advance2000.com/login
- Enter your user name. It will be the same as it is for logging into your computer.
Example: Luke Skywalker’s username would be skywalkerl - Enter your password. To start, your password will be your username with the number 1 at the end; you can change your password under “Account Settings” once you login initially.
Example: Luke Skywalker’s password would be skywalkerl1
Once logged in you should see the following home screen:
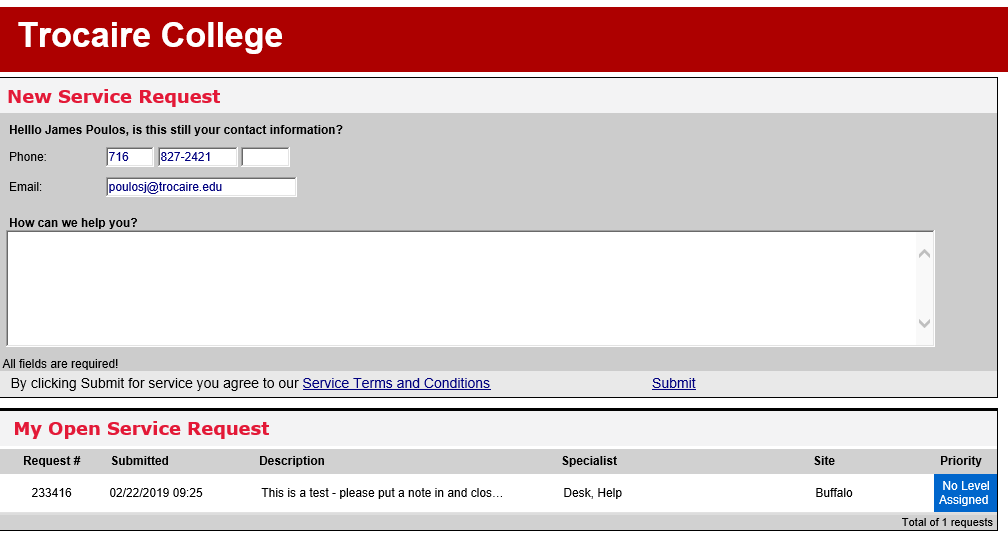
You can see that your information is already populated at the top of the screen. All you have to do is simply tell us about the issue you are having and click the submit button. Please try and provide us with as much detail as possible so that we can resolve your issue in a timely manner.
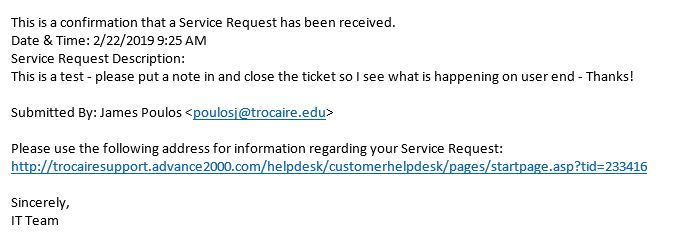
Once submitted, you will receive an email confirming receipt of your submission complete with a quick link to access the ticket in the system. The email will look like this:
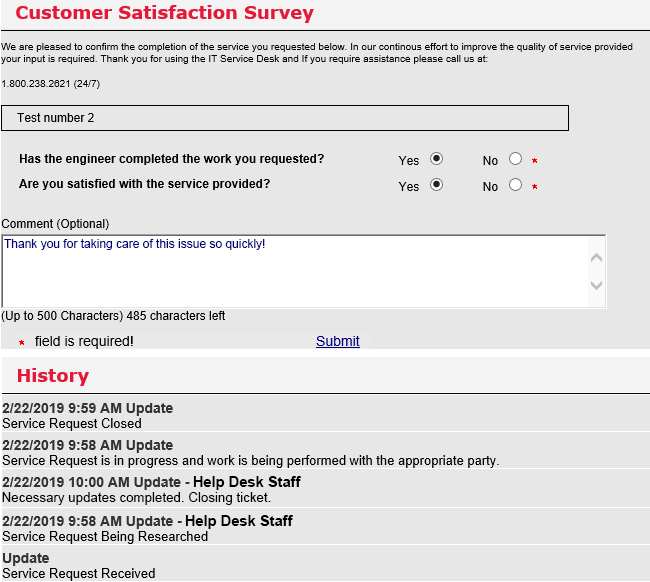
Once a request is submitted – you can track progress by simply clicking on the request under “My Open Service Request”. You will be able to see all activity on the ticket as follows:
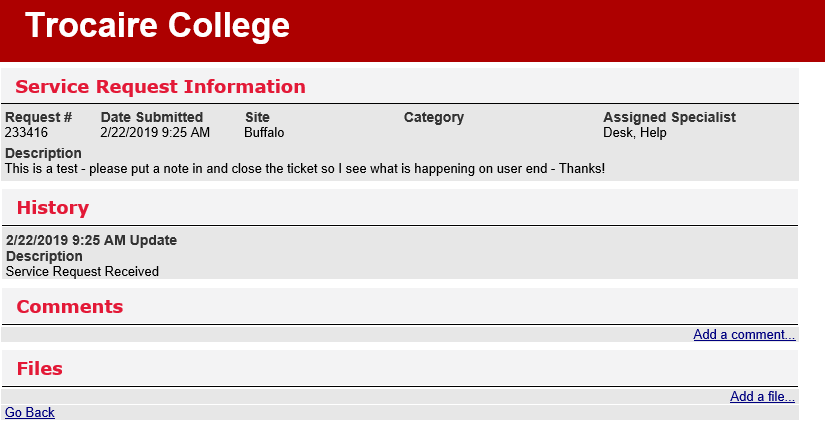
The submitted ticket will be assigned to a technician. The technician will stay in contact with you working through the issue until your ticket is resolved. You can attach files, add a comment, or just simply look to see what was done on the issue under the history section.
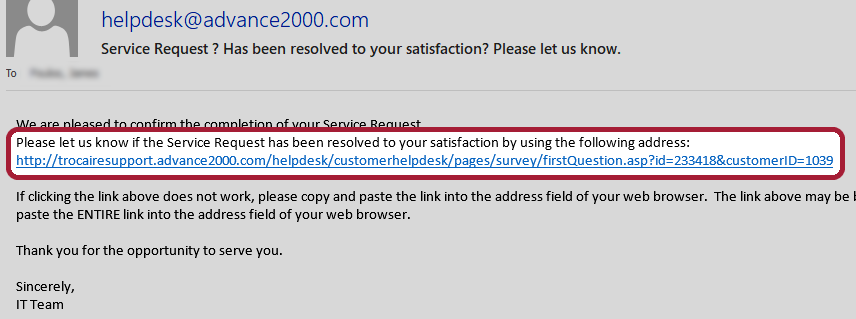
Once a ticket/issue has been resolved, the technician will close the ticket in the system along with noting what course of action was taken to resolve the ticket. The person who submitted the ticket (end user) will receive an email notifying that person that the issue has been resolved and the ticket has been closed:
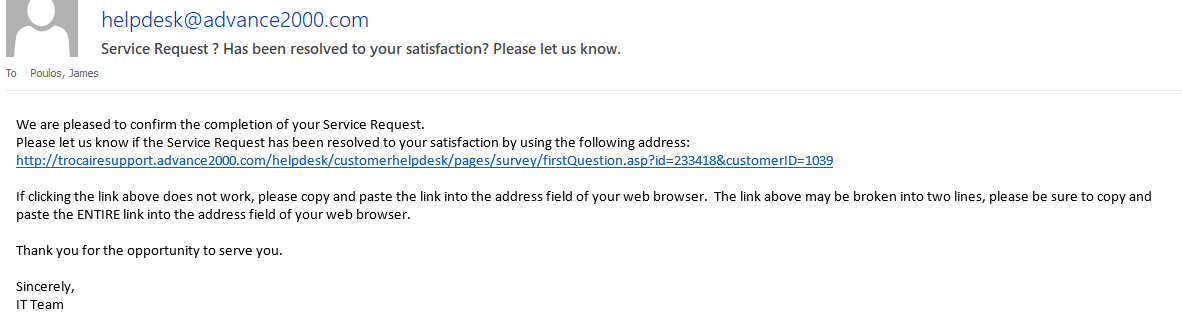
Once a ticket/issue has been resolved, the technician will close the ticket in the system along with noting what course of action was taken to resolve the ticket. The person who submitted the ticket (end user) will receive an email notifying that person that the issue has been resolved and the ticket has been closed. In the email you will find a link which will take you to a satisfaction survey.
This is where you can tell us how we did, whether the issue was resolved, was it resolved in a timely manner, etc.
I would encourage everyone to take the survey after a ticket has been closed so we can measure how our technicians are handling Help Desk issues. The survey only takes a minute or two and will provide us with valuable information on how we are serving the Trocaire Community.
You can change your account info, including your password, by clicking on “My Account” at the top right corner of the page: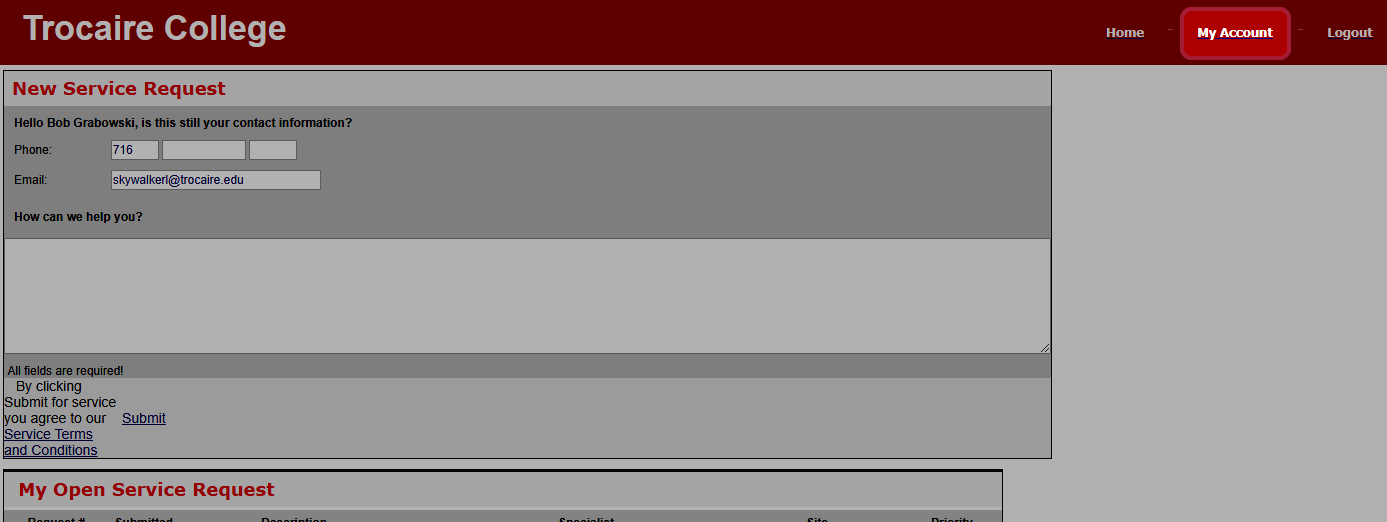
The account page will then appear:
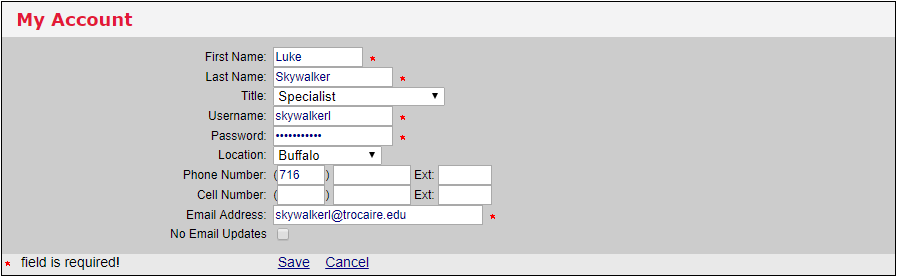
Make the desired changes and then press the Save button.