Getting Started with WordPress
Getting Started with WordPress
This article provide introductory assistance to beginner web editors using WordPress. Before we begin, please take a moment to review the following tips and best practices:
General Tips and Best Practices
- Always preview before publishing. WordPress gives you the ability to preview a page before pushing it live. This can help prevent issues when changes are made.
- When adding links to a new website on a page, make sure click the gear icon and choose the option to open the link in a new window.
- Do not add images that include a lot of text. Due to website responsiveness to different screen sizes, that text can become hard to read for users.
- When writing copy for pages, use headings, bulleted lists and short paragraphs, whenever possible. This will make it easier for users to find the content they are looking for quickly.
- When using images, make sure they are high resolution images that are optimized for the web. High resolution images that are not optimized for the web can drastically impact site load time. Use optimizilla.com to reduce the size of large images files.
To get started, click on the topic that best describes your question:
Logging In
1. Navigate to trocaire.edu/login or my.trocaire.edu/login in a browser.

2. Enter your username or email address in the first field.
3. Enter your password in the next field*. If you don’t know your password, follow the steps below.
*Passwords ARE case sensitive.
Reset your Password
1. Navigate to trocaire.edu/login or my.trocaire.edu/login in a browser.
2. Click “Lost your password?” below the password input field.
3. Enter your Trocaire email in the text box.
4. Check your email inbox for a message from WordPress. If you don’t see the email check your spam.
5. Open the email and click the link at the bottom.
6. The page will show an auto-generated password. You can delete that password and create your own if you wish. Make sure your password is rated “Strong” or better.
Editing Pages
1. Navigate to the “Pages” tab in the left sidebar menu and select “All Pages”.
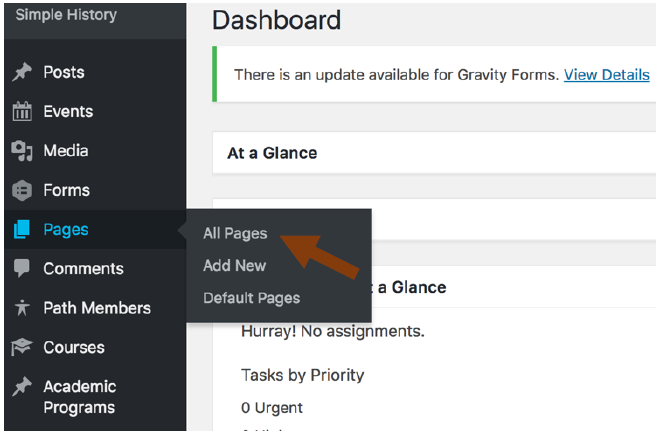
2. Click the page you’d like to edit from the list. If you do not see the page, use the search function in the top right corner.
3. Click “Make Revision” (this will appear when you hover over the title), or when you click on the title as you normally would. If you click the title, you’ll be prompted with another dialog box to confirm you’d like to make a revision.
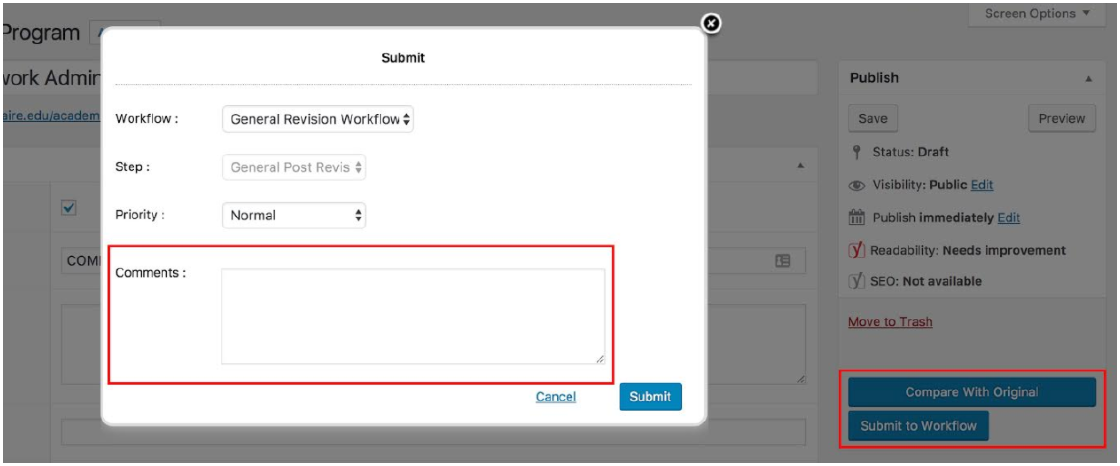
4. Edit the page as you normally would and when finished, click “submit to workflow**”.
5. When prompted with the options boxes, select the “priority” of the revision, and enter any comments if appropriate for the administrators to read when approving or rejecting the edit.
6. If the update is approved, the new revisions will be sent live. If it is rejected, the edit will come back to you with feedback, and you can pick it back up by finding it inside your “workflows” (located on in the black bar on the left, and marked by an orange/blue icon representing how many edits are currently assigned to you).
**Do not make edits to any pages that have already been submitted to a workflow. If you would like to make edits on a page over a period of time, save the changes to a draft instead of submitting them to a workflow. It is not recommended to have changes saved as a draft for more than 24 hrs without submitting it to a workflow.
Adding Media (Images)
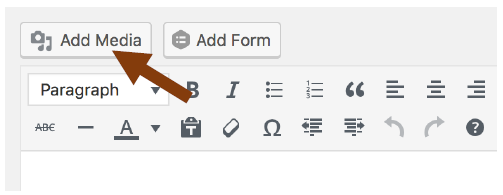
1. In the page editor, select “Add Media”
2. Select the media from the library or upload files by selecting the “Upload Files” tab at the top of the page. If a new file is uploaded, make sure you add a relevant title and alt tag.
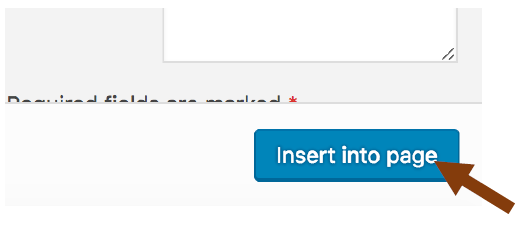
3. After selecting the image, click “Insert into page”
Adding a Link to an Image
1. Click the image that you’d like to link.
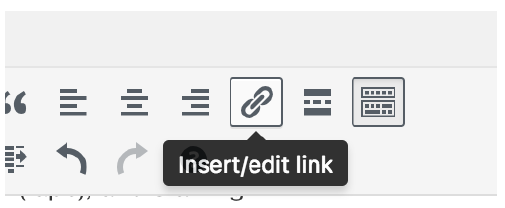
2. Click the “Insert/edit link” button in the toolbar.
3. A text box will appear next to the image. Click the gear icon on the right side.
4. Enter destination link in the URL field***.
5. Click “Update” and preview or publish your changes.
***Select “Open link in a new tab” if you’d like to prevent the user’s current session from being interrupted with a new page.
Working with Courses
Add Course
1. Navigate to the “Courses” tab inside the black bar along the left hand side of the screen.
2. At the top of the list, next to the Courses heading, click the “Add New” button
3. Enter the info for the following fields:
- Title (Located at the top of the page)
- Course Description (Text editor)
- Course Type (Located on the right hand side)
- Course Credits, Course Code, and optional prerequisites/co-requisites (Located at the bottom left of the screen)
4. Click the blue “Publish” button on the right hand side to finish.
Delete Course
1. Navigate to the “Courses” tab inside the black bar along the left hand side of the screen.
2. Hover over the title of the course, and click the “trash” link that will appear.****
**** After deleting, these courses will sit in a trash, where they can be “restored” if necessary.
Edit Course
1. Navigate to the “Courses” tab inside the black bar along the left hand side of the screen.
2. Select the course you want to edit from the list or use the search bar to search for the course.
3. Info for the following fields can be edited:
- Title (Located at the very top)
- Course Description (Text editor)
- Course Type (Located on the right hand side)
- Course Credits*****, Course Code, and optional prerequisites/co-requisites (Located at the bottom left of the screen)
4. Click the blue “Update” button on the right hand side to finish
*****Course credits edits are automatically updated by semester on academic program pages.
Working with Forms
Before getting started…
Make sure you’re creating your form on the correct WordPress site editor. A form that is created on my.trocaire.edu will need to live on a page that exists on my.trocaire.edu. If the form needs to appear on both websites, it will need to be created and managed on both my.trocaire.edu and trocaire.edu.
Create A Form
1. Navigate to the “Forms” tab inside the black bar along the left hand side of the screen.
2. At the very top, click the “Add New” button.
3. Enter the title and optional description of the form from into the pop-up.
4. Select the form fields that you would like from the right hand side by clicking or dragging (clicking will add them to the end, and dragging will allow you to place them between other fields).
5. Be sure to expand the fields by clicking on them, and fill out/update the “Field Label” and whether or not the field should be required (from the “General” tab), the “Placeholder” field (on the “Appearance” tab – this can match the “Field Label”), and any “conditional logic” (this is found under the “Advanced” tab, but likely won’t be used).
6. Make sure all question choices are filled out where applicable.
7. Under the “Settings” item, be sure to update the following sections:
- Notifications: This will control who the emails get sent to. Hover over the default “Admin Notification” and click edit. Clicking the drop-down icon to the right of the fields will allow you to select a field from the form. The “From” and “Reply To” fields should be filled with the submitter’s email field, while the “From Name” can be the submitter’s name fields, which can be selected from the drop-down to the right of the inputs.
- Make sure the ‘from’ email is not the admin email, otherwise when emails are replied to they’ll be sent to that email instead of the person who submitted the form. “Send to” should be the Trocaire emails that you want the emails sent to.
- An additional new notification can be created to send the user that submits the form a confirmation email. This new notification can include customized confirmation message and next steps for the user after a successful submission.
- Confirmations: Forms have the default message: “Thanks for contacting us! We will get in touch with you shortly.” To set a unique confirmation, see the next step.
- Select correct confirmation type (Thank you message = “Text” or Thank Page = “page”)
- Thank you message: This is where you will type out the thank you message that displays when the form is successfully submitted.
- Thank you page: You can also redirect users to a Thank You page if desired. That page should be created before the form. Select “Page” as confirmation type and select the new thank you page from the drop-down.
- Select correct confirmation type (Thank you message = “Text” or Thank Page = “page”)
Adding a Form to a Page
1. Navigate to the page where you would like to add the form.
2. On the content editor, select the “Add Form” button and choose the form from the drop-down. You can deselect “Display form title”, and “Display form description”, but be sure to check the “Enable Ajax” box.
3. You will see a code entered that looks something like the following: {gravityform id=”3″ title=”false” description=”false” ajax=”true”}
Working with academic programs
Add Academic Programs
1. Navigate to the “Academic Programs” tab inside the black bar along the left hand side of the screen.
2. At the very top, click the “Add New” button
3. Enter the info for the following fields:
- Title (Located at the very top)
- Hero (Located under the title)
- Include Hero – Check the box if you would like to include a custom hero image.
- Header – You can use this to override the program name that appears over the hero image. The program name should be in all caps.
- Subheading – This will include small text below the header (not typically used)
- Background Image – This will allow you to display an image in the hero section. Image dimensions should be 1024 x 685 px.
- Program Type (Located on the right hand side) – Program type is used to show what degree level is offered for that program (certificate, associate or baccalaureate).
- Program Director, Resources and Program Image (Right side of the screen)
4. Click the blue “Publish” button on the right hand side to finish.
Delete an Academic Program
1. Navigate to the “Academic Programs” tab inside the black bar along the left hand side of the screen.
2. Hover over the title of the course, and click the “trash” link that will appear.
**** After deleting, these courses will sit in a trash, where they can be “restored” if necessary.
Edit Academic Programs
Navigate to the “Academic Programs” tab inside the black bar along the left hand side of the screen.
1. Select the program you want to edit from the list or use the search bar to search for it.
2. Info for the following fields can be edited:
- Title (Located at the very top) – By default, this will show overlaid on the Hero Image
- Hero (Located under the title)
- Include Hero – Check the box if you would like to include a custom hero image.
- Header – You can use this to override the page title program name that appears over the hero image. The program name should be in all caps.
- Subheading – This will include small text below the header (not typically used)
- Background Image – This will allow you to display an image in the hero section. Image dimensions are 1024 x 685 px.
- Program Type (Located on the right hand side) – Program type is used to show what degree level is offered for that program (certificate, associate or baccalaureate).
- Program Director, Program Resources and Program Image (Right side of the screen)
3. Click the blue “Update” button on the right hand side to finish.
Editing Courses and Curriculum
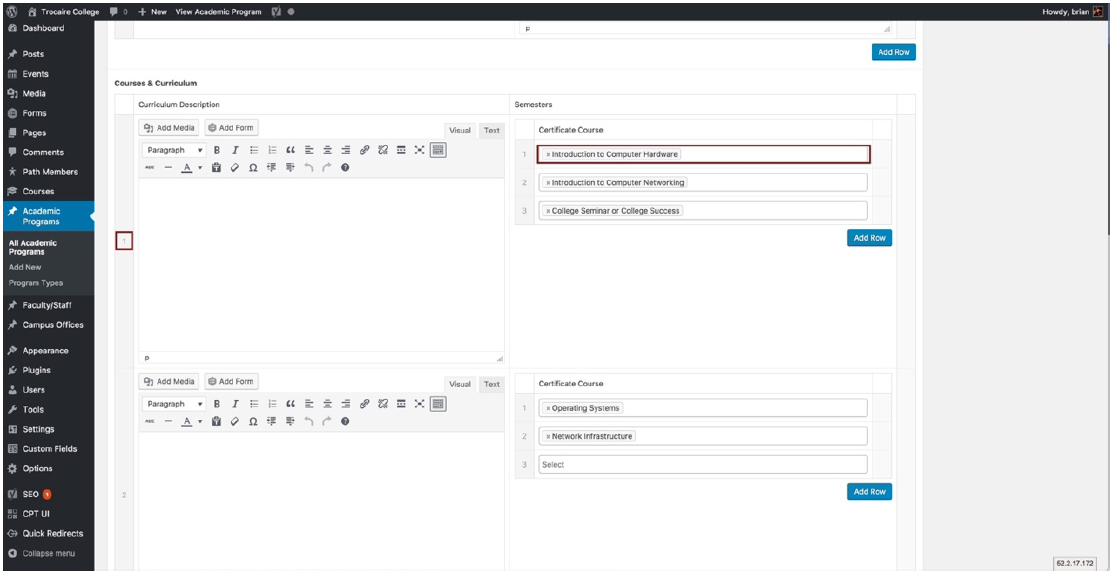
Under each “Academic Program”, there is a section titled “Courses & Curriculum”. In this section, there are 3 actions that might be taken:
1. Add a semester: To add a semester, you can click the “+” icon on the far right that appears on hover. You can see the semester count, which is indicated by the number highlighted in red on the attached image.
2. Add a description of the semester: To add a description, you can use the Rich Text Editor on the left, and add content the way that you would in any other text-enabled area of the site.
3. Add courses to the semester: To add Courses, you can click the “Add Row” button shown in the attached image, and begin typing to name of the course you’d like to add, before selecting it from the drop-down that will appear.
If courses or semesters were added in the wrong order, they can always be dragged around, to change the order they’ll be displayed in. When done, remember to save your changes.
Managing Web Files
Website media files that appear in multiple places throughout the website can be easily changed or updated using the Media Library.
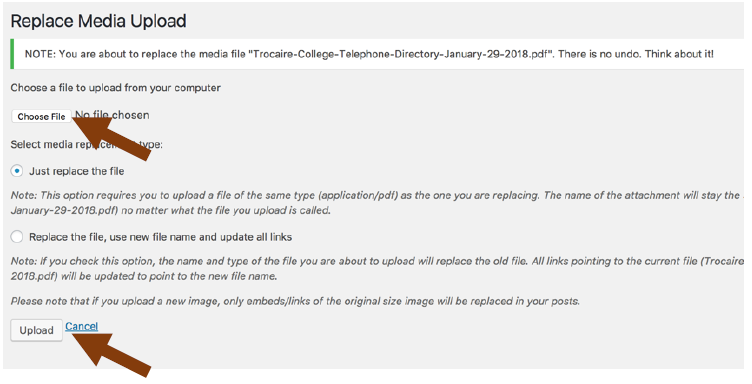
Updating a Media File
1. Navigate to the Media Library in the side menu.
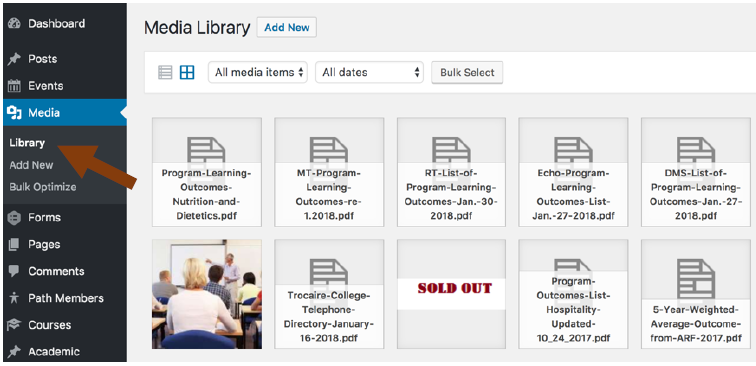
2. Click the file that is being updated from the library of files. Use the search function to search by file name.
3. In the file menu, click the “Upload a new file” button.
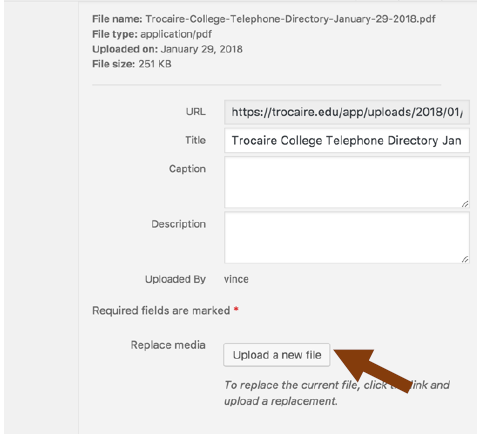
4. Click “Choose File” to select the new file from your computer. Then click the “Upload” button to replace the old file. **This cannot be undone.**
Clearing Formatting from Text
When you copy and paste content in to the editor from other sources, it can bring the formatting over automatically. This leads to web pages containing different fonts and font colors that are not consistent with
the Trocaire College brand standards.
When making edits and building content on your pages using text from other sources, use one of the methods below to revert back to the website default style.
1. Expand the toolbar in the visual editor.

2. Use the clear formatting button in the visual editor. This will return the selected text to the default format.
![]()